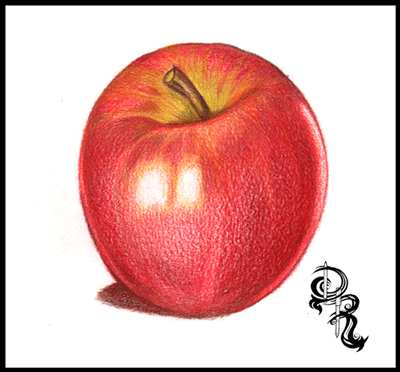
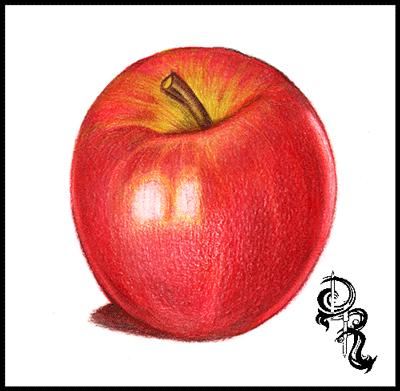
Showing posts with label help. Show all posts

Thursday, June 25, 2015

Free Art Lessons for All Fundraiser


I am raising money to help fund Free Art Lessons on and offline. My art lessons are written for artist of all ages and skill levels. I want to make these lessons free and available to the public online and offline in a classroom like setting. To do that I will need some help and support. 

My name is Derrick Rathgeber and I am a colored pencil artist. As an artist I have been very successful as I have been featured in a national magazine, I have been shown in galleries local and abroad, and I have won a few showcases. I would have to say through all of it teaching gives me the most joy. I love hosting classes and volunteering my time to help artists of all ages learn new skills, and develop their technique to find themselves as artists. 

One thing I cannot understand is how much art lessons cost these days. On average a lesson will go from $50.00 - $300.00 per student, and not all places will provide the tools the artists need in the class. I myself am low income, and I know others are as well. I don't feel they have to choose. One thing I am sure we can all agree on is that there needs to be more ART in this world. 

So here is what I plan to do. I will host free art lessons for all ages and educational and financial backgrounds FREE of charge. Right now I have 5 FREE lessons online, and I will have many more to come. What I need your help with is the funds to rent a space, art materials, and advertising. Once we get the word out and grow I will have professional artists of various mediums pass on what they know to aspiring artists. I have a vision of having a space where we can teach anyone who wants to learn how to sculpt, dance, draw, sing, and much more. 

Donate today and Support free Art for all.

Visit the Links below for some great examples of my art lessons. 

https://www.pinterest.com/DtheArtist/free-art-lessons/

http://derricktheartist.blogspot.com/2013/08/how-to-color-delicious-pink-lady-apple.html


Thursday, May 29, 2014

Trouble Getting Started? Tips to Get your Artwork Moving.

One of the most difficult things I have trouble with as an artist is just getting started. To me it’s something that drags me down like quicksand. The struggle of pulling myself together is a fight I deal with daily, and the more I fight to get started I find myself procrastinating more. In my case I feel as if I start one project I am neglecting myself of another. As of now I have split my talents into several different locations, that I am completely scatterbrained at times. It’s as if I am stuck in a dark tunnel with ten paths to choose, and rather than take the chance of taking the wrong path I stay in the same spot. Unfortunately choosing the safe spot moves me nowhere and nothing gets done, and every project suffers.


If you are new to my blog, or website my name is Derrick Rathgeber, and I am a husband, father of four great kids, a colored pencil artist, comic strip writer/artist, blog writer, free online art teacher, web designer, graphic designer, and soon I will try my hand at writing a book. All that is true I have done all those things, and you can find them on my website and right here on this very blog page. What the funny part is that I have put my hat in so many pots that I have overwhelmed myself to the point where I don’t know what I want to do. Each of these things are my hobbies, and I really do enjoy them all equally. I love making people laugh with my comic strips, I love designing characters for my story, and I love drawing detailed pictures with my colored pencils. So how do I choose? When I finish one project, how do I choose what to do next? When I start one I put all my energy into it, energy that I could have put into another one.

This was a problem for me for a very long time. I tried different things, and ultimately what worked best was just being down right organized. First of all my greatest enemy is procrastination. That to this day is the hardest enemy to kick in the rear, but you know what I am learning. I’ll start tomorrow, I never do anything for myself, I am tired, I don’t have what I need and so on. Some great tips to help with this little demon are as follows.
  1.  Ask yourself: Is what I am doing now beneficial? What would be more rewarding? How will I feel if I continue to put this off?
  2. Put off Procrastination: It may sound funny but think about it. Turn off any devices that may lure you away from your projects ie. Tv, internet, PHONE! All these things will be there later.
  3. Reward yourself: I always tell myself if I draw today for x amount of time then I get to have x amount of time to do something I like GUILT FREE.
  4.  Break it down: Sometimes we are overwhelmed by a large project. So overwhelmed that we don’t start it. So break it down. Say I am going to sketch it today, color this section tomorrow ect. This also helps you take your time and enjoy your new project.
  5. Share your Success: Let people know how important it is to you. Sometimes we feel guilty for taking time from our friends and family. Sometimes they don’t understand what it means for you to be productive. Let them know, and ask for support. Say don’t call around 2-4pm I will be working, or can you watch the kids for a bit. And once you are finished working thank them by giving them your full attention. 
When it comes to deciding on what to work on next that is another hang up us artists deal with. Do we start on that commission piece? Do we draw that picture your mom has been asking for? Do I dare ignore everyone and draw that image bouncing around in my head? Again it answers the question how do I spend my time and energy? In my case I pulled myself so thin at one point that I just fell apart and did nothing. I had to get focused, and combat this problem because I wasn’t getting anything done. So what I did was I got organized. This was very important for me because I was all over the place. I didn’t even know what projects I had half of the time, or what I finished. So these are some of the things I did, that you can do yourself, to get organized.
  1. Make a list: Write down a list of projects you have. This can be commissions, drawings you would like to do, blogs, website, ect.
  2. Prioritize them: Number these projects from 1-10+ based on which projects you would like to get done, or maybe ones you were putting off that you would like to finish.
  3. Make a Time Table: Next to each item write down how much time you need for each project. If it’s unknown it’s not a big problem. Ones that you can finish fast are good ones to knock off in-between larger projects.
  4. Make a calendar: This is actually fun. Make yourself a weekly calendar giving yourself that day to work on a specific project, and be sure to add a FREE DAY on this calendar to give you the opportunity to work on projects that are behind, to work on whatever you want,  or just take a day off to rest.
  5. Don’t make it Law: If you have to make adjustments it’s okay. Life changes and so can your schedule. So don’t feel guilt about changing the calendar, or missing a day or two. It’s mainly a tool to help you decide on what to work on that day. If your heart is in another project follow it and finish that project, you should never force it.
Once you have everything in perspective you will find your days going much smoother and a lot of guilt that goes along with starting something new will start to pass. You want to get into a good routine of developing yourself as an artist, but also find yourself being productive. Above all try not to make it work. A reason some of us find it hard to start up something new is fear, and worry. We worry that it won’t come out right, or fear that it has become work instead of enjoying it. When you feel that pressure, and fear building up just sketch. Don’t feel obligated to share it, just grab your sketchbook and just draw. This helps relieve that pressure we all feel to be at our very best all of the time. As artists we are our worst judges, and that can do nothing but hold us back.

So today if you are holding back a great new design that can wait, push through the muddiness and get through. Today it’s harder than ever with the many distractions that we face, but we have to close that world off and dive into our imaginations and pull it out. It’s not an easy fight sometimes, but this world of technology needs more creativity. Just remember every time you start a new project you are making the world that much better and more imaginative. That itself is a great reward, and incentive to start today.

Thank you for reading,
Derrick Rathgeber

Feel Free to find me on my website at http://DerricktheArtist.com

Tuesday, March 4, 2014

Derrick the Artist is on the Rise!


Oh what a fantastic start for 2014. Where would I be without family, friends, and my fantastic art community? Not where I am today I can guarantee that. I have some building to do, and a bit further to climb, but the direction I am going is definitely the right one. 

Over the past few months I have had some ups and downs on the course of my art career. I missed a few promotions here and there, and even more shows, but that is all in the past. It's funny how God works. Just when you feel angry with him, and you begin to think that he is not listening, he shows you he is. Last month I wrote about my anger with the world. How I have given all that I can give, and I felt it was my turn to get some help now that I needed it. When that help didn't come right away I was angry. I felt like a spoiled brat, but at the same time I knew it was good to voice my frustrations. A few weeks went by and although nothing had changed I felt a change in the air. It was like the pressure I placed on myself had lifted, and I forgot why I was angry in the first place. And that's when everything changed. 

The name Derrick the Artist was already on the Rise. This year alone I have already started my first large show. The Annual Artscape in Riverside, CA. This show is big, and runs from February to August of 2014, and in May I have been asked to draw a few pieces for the Riverside Prom, and join the committee. My artwork which is produced using RoseArt brand pencils is going to be see by a whole lot of professional artists all over. I have never been able to pay for the expensive brand name pencils and to me that didn't make a difference. I used what I had, and did not understand the impact that would have on the people around me. 

On this blog you will notice that I give art lessons using the RoseArt pencils. Despite the critics the pencils are a great price range that all people can afford, but to me they output fantastic colors. As I started to make more lessons using pencils that more students, and young children were using I found there was a need for these lessons to be accessible. I have been getting a whole lot of thank you letters and messages asking me to make more, and they like to know that because they cannot afford the high priced art supplies they to can produce award winning art as well. They weren't limited to their budget like myself. I like being there for these young adults and artists who have questions. It feels good, and eventually I would like to set up an artist mentoring program on a volunteer basis as one of my goals. For now I'll continue building, and working for it. 

Another big deal for me that I received recently was a donation on my website by a lady from Kentucky. No kidding I was running out of colors to use, and I was seeking donations to purchase new pencils, and paper. My last black had whittled down, and I kid you not that morning I received a donation that allowed me to purchase enough materials for the next few months. I am usually the one outputting all that I can, and I cannot believe that someone felt I was worth investing in. It really brought my soul back to life, and I was lifted up with ambition to do more. I cannot wait to pay it all forward and giving all I can give, and teaching all I can teach to all that will ask or listen. 

So as I am on the rise be sure to continue watching to all that I am putting out. I built a shop to sell my artwork on great gifts. The proceeds go to adding more options and building the Artist Mentoring Network. I will be seeking artists who are willing to chime in voluntarily to help young artists, and student artists.My comic Strip Twisted Fate will be growing, and becoming an animated Flash comic by 2015, and my art lessons will continue to grow. Possibly a book by next year as well. Finally new large pieces of artwork to share with the world. I hope you will continue to join me as I grow as an artist with you. Remember to visit my webpage for news and updates on everything. 
I want to see all of you Rise with me as well. 

Thank you for reading, 
Derrick Rathgeber

Thursday, October 17, 2013

Success is not a Dollar Amount

I have come a very long way since I have started drawing again. I have a new website, my own blog page, and my artwork has been seen all over the world, and I am currently in a gallery here in Riverside until August.  To me I feel like I reached the top as an artist. The only thing that would make my journey complete would to be able to live off of my artwork. Being that I have yet to sell more than one print, I can honestly say that is not going to happen. In my entire art career I have only sold one original drawing, and one signed print for $20. Does that make my career in art a large failure?

The answer is heck no. I am sure there are plenty of artists out there who place their work on the web in hopes it will go viral, and sell 1,000s of prints, but only get 5 likes. And maybe you have placed your work in a showcase in hopes people will buy your piece, only to take your card and lose it. Believe me you are definitely not alone. I have found that there are a lot more artists in your position than you think. And each one is more discouraged and ready to quit than the next.  I know I wanted to quit myself quite a few times because my art just wasn’t selling like I wanted to.

Then I woke up one day realizing that I almost quit doing what I love because someone didn’t give me money for it. I felt like an idiot. I almost gave up a talent that others strive for because I was selfish and wanted money. All the new upcoming artists that came to me for help and questions were going to be sent away, and the people that subscribed to my website, and blog, social media sites because they enjoyed my work were no longer going to see it anymore. I almost let my kids down who look up to me because in their eyes I am the best artist in the world. To me that almost made me sick to my stomach that money became that important to me. Has the world broken me down so bad that money took a place hire than a talent that no money could ever buy?

So I decided that I would no longer see success measured with a dollar amount. And no one should. Have I made millions of my artwork? No. Have I hit over 100,000 likes on Facebook? Far from. What I have done is inspire young artists to continue bettering themselves. I made someone laugh with my Twisted Fate comic. My work has been seen by people all over the world without spending one dollar in advertising. I have shown people what you can do if you put your trust and patience in yourself, and really enjoy what you do. That is my greatest successes as an artist. If I can keep going, and push myself to finish piece after piece, comic after comic, share my drawing lessons online free, and just help others, then I feel I have reached a level that I didn’t know existed.

What defines you as an artist? Ask yourself why you started? Why do you love it so much? Why do you or did you want to quit? For me I started because I really enjoyed taking my imagination, and thoughts, then just laying them out all over the paper.  I love it now because I can see things that other people cannot. A gift to see colors that did not exist before and I can share them with all of you. It makes my day. I wanted to quit, well for a reason that wasn’t good enough because I am still here. I am still here drawing, coloring, and sharing it all with all of you, and I hope that as long as I continue to share what I have to give with you, that you return the favor .  I want to see all of your talents, because art, poetry, words, stories, imagination, it makes the world a much better place to live in and enjoy.  

"You are already successful because you picked up the pencil,  and made the world that much more beautiful."

Thank you for reading,
Till next time my friends.

http://Derrickr.Webs.com

Wednesday, August 21, 2013

Don't Let Life Hold You Back.

It's been a while since my last post. There has been a lot going on in my life that has put a strong hindrance on my ability to focus on my artwork, and website. As most of you know I don't make a living off of my work, one day I would like to, but for now it is a fun hobby. I enjoy all the feedback, the chance to share lessons with you all, and of course any advice I can give.

I feel lately that I needed some advice and help, and I wasn't getting that in return. I reached out, and got nothing. I'll admit part of me was really bitter and spiteful. I ran scenarios in my head wondering how convicted killers could get donations in the thousands for the best lawyers, or how people come together to build a brand new home for someone that already has a nice trailer home, because they felt it was too small for them. I didn't understand and I was going down a really dark road in my head. I think the nail in the coffin was when I asked a company I have been supporting all this time with free lessons, and promoting their products with my artwork completely blew me off. All the plans we made in the beginning for a duel artist pencil sponsorship and advertisement went right out of the window after they got what they wanted. A free art lesson from an artist that used their pencils because it was all he could afford. It's not the first time I have been burned by the big corporations either, but that is many other stories, and I don't want to be that guy anymore. I am done reliving failures, or believing I have have failed due to my situation.

Regardless of where I am in life I have to remember that others are either in the same position I am in, or worse, and I have to remember that they look up to me. I felt recently that I let those people down because I cracked under pressure. I stopped drawing, and I stopped making lessons. I just froze up. Just know I am still here, and I have more work to show. I have more help to give, and I look forward to helping again. I am sorry I was gone for a while, but I am back, and I don't want to let life interfere with my love for art ever again. I may need some help with that.

I just need to know that what I do here, and on the web is worth it. I pour hours into the lessons, and I don't ask for money like other sites or artists do. If it helps you learn a technique that improves your work that is my payment. In time I will eventually make a book, but for now I just like to help out because I know there are artists that cannot afford to pay for lessons. The same for my comic strips. They make me laugh, and I am happy to know that it made someone laugh. And my artwork, I plan on drawing some more again, in fact I set up the paper for a new piece today. It will be a black and white and that is okay with me. I am going to stop placing rules on my artwork, all that did was hold me back, and make me unhappy.

After all of this I am in a better place. Looking back on what I wrote I feel that I needed to get somethings off my chest if I were to continue. I am going to start drawing for me for a while, and I promise to share new lessons. In fact my daughter gave me the idea for the next lesson. She wanted to learn how I draw trees so fast and realistic so look forward to that in the near future. My next piece on the other hand, you'll just have to tune into my Facebook page for updates, and work-in-progress images. What I can't give out all the details right? I didn't go away for good, but I did fall asleep for a bit. Thank you for sticking around and supporting me through it all. I have learned one all powerful lesson in all of this.

Support doesn't always come in the form of a dollar sign. Your kindness, comments, likes, and just all around support for my work. It helps make everything I do worth it, and I cannot wait to do more. I am not going to let life's obstacles hold me back anymore.

Thank you,
Derrick Rathgeber
http://Derrickr.webs.com
http://Facebook.com/DerrickRathgeber
Donations Accepted


Thursday, June 27, 2013

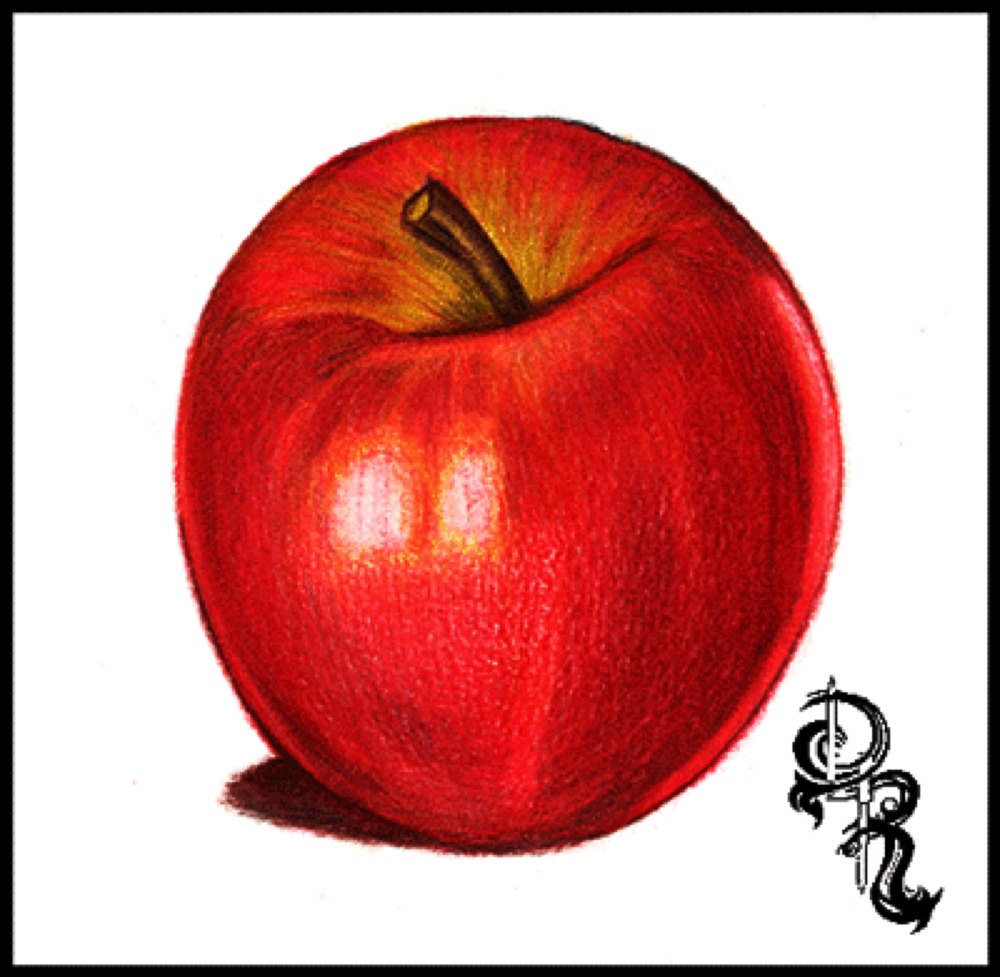
How to Color a Delicious Pink Lady Apple

How to Color a Delicious Pink Lady Apple
by Derrick Rathgeber


RoseArt Colored Pencils we will be using.
·         White
·         Golden Yellow
·         True Orange
·         Bronze Yellow
·         Celery
·         Cardinal Red
·         Cherry Red
·         Raspberry
·         Brown
·         Black

Welcome to the great drawing lessons here on Derrick the Artist. Today I will be teaching you how to color your very own delicious pink lady apple. In this exercise I will give you tips on how to over lay colors, blend them to create lights and shadows, as well as textures.  So let’s get started shall we.

Step 1: If you are comfortable with your drawing skills start off your picture by drawing the apple shape below with the brown colored pencil. Remember your apple does not have to be a perfect shape because no apple is a perfect sphere.


Tips:  A PDF version is available if you would like to skip this step and go right into the coloring. Download the printable version by clicking the link below: 

Step 2: Using the Golden Yellow make dark to light strokes outlining the shine. Start at the base of the step and define the shape of the apple. This color will act as the base and guide for the rest of the colors to come. Next use the Bronze Yellow and darken the yellow areas on the stem and the area around the stem. This will help blend into the green Celery color in the next step.


Tips: Use more pressure on the pencil at the edges and around the shine areas, then slowly raise the pencil up decreasing the pressure of the pencil.

Step 3: Using the Celery color you will go over the Golden Yellow color on the top of the apple. Start from the base of the stem and create line in arcs to the rim of the apple, then fill them in with the Celery green covering a good area of the top, but leave some areas available for the red to come through. Also add some Celery color to the stem as well.


Step 4: Now it’s time to set the base for rest of the apple. Using the True Orange we will start from the stem base and color the apple almost like a pumpkin.  Fill in the top half of the apple leaving small empty spaces along the edge, and along the base of the bottom. Keep a white strip-like area empty along the right side of the apple, as this will act as a reflective shine making the apple look more realistic.


Tips: References are great. If you have an apple at home shine a light on it to see how light shines and reflects on it so you can replicate this effect in your drawing.

Step 5: It’s time to watch your apple come to life. Use the Cardinal Red and cover the apple in nice even strokes with the apple from top to bottom and at a curve. Remember to leave the large shine in the center, and on the right clear. I like to rotate the paper so I can keep my hand still and move only the pencil across the paper. Once the apple is covered evenly begin adding pressure and coloring in areas darker near the edges and the top of the apple. Leave the area near the large shine lightened as shown in the picture.


Tips: Try to keep your pencil stokes in one direction. In this case arc them downward creating the illusion of a round object.  After you have covered the area you can crosshatch to darken areas of the drawing.

Step 6: The candy apple read that makes you drool. That’s what we are going for. So let’s add the next layer of red. This time we are using Cherry Red to help fill in gaps, smooth out our fruit, and generate a one of a kind look. Starting at the borders of the apple we are going to go over the Cardinal Red and start coloring towards the shine lightening our strokes along the way. Also get the top of the apple, and overlay the red partially over the yellows and greens to pull it all together. When you are satisfied with the look of your apple, move on to the next layer of red in the next step. Yep that’s right Three layers of red.


Step 7: This is the last layer of red I promise. Grab the Raspberry Red colored pencil and use heavy pressure along the areas you want to add shadows to. You can use the image as reference or use your gut. Get the areas close to the edges, and highlight the shine on the top near the stem. At this point your apple will have a realistic shine and reflect the paper it is drawn on. As an option also use this color to create a shadow on the floor. Remember where your light is coming from and color your shadow based on that. In this case I have light coming from the rear and the front so the shadow is outlined as shown.


Tips: If your drawing doesn’t look like the image shown do not worry. If I were to draw this again mine would look different too. Remember to enjoy yourself and take your time.

Step 8:  Time to give your apple an earthy look, and finally give that stem some color. Reach for the Brown and fill in the stem from base to top leaving some green color. Remember to color with the stem shape, and for an extra measure of realism sketch some harder lines. Next add a layer of brown across the entire apple, and the shadow. Remember to leave the shines white. Adjust your pressure to the level that you want. This gives the apple some more texture, and colors to capture the eye. 


Tip: If you would like to color the apple with other colors you can use these techniques with most fruit and objects. Simple adjust your color palette, and have fun.

Step 9: We are now heading to the final touch ups. Get a hold of the Black pencil and we will finalize the shadows.  Start off by coloring over the shadow on the ground. Once you are finished start darkening the left side using the shines as a guide to stop. On the right side of the apple you will start from the white strip and go from heavy pressure to light pressure as you meet in the middle. Then add some dark areas in the stem to show that the apple dips in. Once you are satisfied with your look we will move on to the final step. 


Tips: Black is your friend. With colored pencils you can cover other colors without making over shadowing them completely. If you need to go darker simply add another layer.

Step 10: And we are at the finish line! This step is probably one that most people don’t see coming. Go ahead and take the white pencil, and start coloring over the entire apple. You will notice that as you color the colors will not only lighten up but they will blend together and smoothen out. This is probably one of the greatest kept secrets, and now you know. The white colored pencil is probably the most important pencil in your collection. 


Thank you for visiting and I hope you enjoyed this lesson. More are available right here on my blog page, and at http://RoseArt.com/Blog. Be sure to check out my website for more updates, and upcoming lessons, and new art. 

Upload your lesson results on my Facebook page. Each month I will giving away great prizes, all you have to do is share your results with me at: http://Facebook.com/DerrickRathgeber. Remember to have fun with it. 


Friday, June 14, 2013

Featured Art - Bird in Bloom: Never Give up

Bird in Bloom 
by Derrick Rathgeber


Bird in Bloom this piece is so nostalgic to me as an artist. I think it means more to me that most of my art pieces, and for good reason. I went from a very dark place to a new brighter future with this one picture. 

Back in 2008 I was in a severe accident on the job, as a cable technician, that left me completely disabled. I was crushed by a faulty ladder and my entire body was bent backwards like an accordion and what was worse was the 150lb 14ft extension ladder landed on my right wrist. My chances of ever drawing again were not looking good at all. What made things worse was the fact that my injury was on the job. The insurance company never took my injuries seriously, and to this day they are still refusing treatments. 

In 2009 I continued to work on these injuries due to the insurance companies doctor. Although my treating physician placed me on full disability the insurance company sent me to a "wrist" specialist. This doctor examined only my wrist and hand, and not the rest of the injuries which included my back, lumbar spine, hips, shoulder, neck, and so on. Based on his report my work limitations were decreased and I was sent back into the field. I continued to take it easy and do only disconnects, and simple installs for a while. Until May 1st 2009, my co-worker called in sick. It was his week on call, and they had me take over his work load despite my limitations. I argued, but they threatened terminating me, and I had a family to think about. I really wished I listened to my gut. That day I pushed myself too far. I did two line drops, a trench, full house install, and multiple line repairs. I worked from 8:00am - 8:00pm with no breaks. In Blythe the weather that day was 110 degrees. Needless to say I just went home and passed out for the night. 

May 2nd 2009, Probably the scariest day of our families lives. I woke up from the day before completely drained and exhausted. I was constantly dizzy and couldn't focus. I felt really sore so I tried to do some yoga to stretch out a bit. I put the DVD in and did about half of the warm-up but that was too much. I told my wife that I was just not feeling well and went back to sleep. She watched the kids, and I went to lay back down. I woke up again around the evening time and went to the rest room. Sorry if this is a bit graphic but I peed what looked like Coca Cola. It was black. By the time I was able to look what happened I was already blacking out. My kidneys were failing. I got to Palo Verde Hospital and they were a bunch of retards. They made me get out of my wheelchair, and walk. Took their time to get me a room. And when the blood results came back they thought it was an error, and almost sent me home with Gatorade. You see with all the injuries I had and me working myself to death the day before in the heat I got Rhabdomyolysis - (the breakdown of muscle fibers that leads to the release of muscle fiber contents (myoglobin) into the bloodstream. Myoglobin is harmful to the kidney and often causes kidney damage.) 
My CK levels were over 90,000, and they are supposed to be within the 150 range. I was literally off the charts and should have been dead. After being transferred to an actual hospital in Sun City Arizona (another 4 hour ambulance ride.) I had to stay there for a good two weeks until my levels were in a respectable range. And finally I was taken off work for the time being. 

It's now 2012 and that day still haunts me. I am in a huge fight with this insurance company as I imagine most people are. I can still feel my body degrading, and falling apart. My wrist has developed carpel tunnel and signs of arthritis. My elbow, back and shoulder hurt with every use, and I now require a cane to walk. Did I mention that I am in my 30's. I had about given up any hope of ever draw or have a normal life ever again. I was in such a hole that I really wanted to just give up. I wasn't getting better, I wasn't getting paid anything, and it really hurt to do anything I liked to do. Even sitting down for longer than 20 minutes would kill my back. I didn't know why I was left to just rot, and I lost all faith in people.  

I bought me a new sketchook, it was suede covered, and very nice. At this time I hadn't drawn a picture in years. Not so much a doodle. I felt like I was losing myself, and I needed something to change. I had to make myself some rules. I draw what I want. I don't judge it, and I don't share it with anyone. Just draw. 
And I did. I found small times where I would just sketch, nothing fancy or great, but I did it. My hand was shaking, my wrist was in severe pain, and my back was straining, but I was drawing. That's the only thing I focused on. I noticed over the next few pages that I was slowly getting it back. I noticed that I was actually getting a bit better. Because of the pain, and shaky hands I had to slow down. I couldn't draw for hours anymore, but with the time I gave myself to draw I was completely focused, and really looked closely at the drawings. I was no longer the fast artist I once as, who learned to animate and draw accurate lines with one stroke, but a new kind of artist that drew sketchy lines, and slowed down quite a bit. It wasn't worse, just different. 

Towards the end of the year I was at the store and I came home with a large poster board. I said to myself, I am going to full this paper up with color. I was going to to a full 22" x 28" colored pencil drawing no matter how long it took. I grabbed reference shots and compiled it together. I chose the Gerber daisy because it's my wife's favorite flower, and this picture was dedicated to her belief in me. And the humming bid was because well we see them all over our back yard, and I thought it would look great in the picture. For the next three months I worked on this piece, and I was shocking myself. By the time I was done, I didn't believe I did it. I almost didn't want to finish it. After posting it online I was approached to place it in a show. At this time aside from the fairs, I had never been in a show, or a gallery. And this showcase was a juried show with professional artists. 

Something funny happened at this show. I won Best in Show. I didn't expect to win anything to be honest. Now this wasn't a money winning category, but I won. Part of the reason was my colored pencil drawing was categorized as a painting. They thought I colored this piece so well that it was a painting. Even better the judge couldn't believe the size of the piece, and he told be that he himself couldn't do it. Me I thought nah he must be buttering me up or trying to make me feel better. That was until people were shaking my hand. They were respecting me as an artist, and calling me their equal. This was all new to me. I wanted to do this all my life, and now it's possible.

So with this piece I was able to start new. I am still in a lot of pain, and may never be the same again, but now I have a future to look forward to. I have drawn many more colored pencil pieces since then, and I continue to do much more. I may not have a lot of money, or completely healthy, but I have a great family backing me, and I feel so successful as an artist because I am able to draw again, and share my work with all of you. I hope if something ever happens like this in your life that you use it to better yourself too. Don't let negative people, and negative events in your life take away your life. I wasted a lot of time in sorrow, and pain. I can't imagine where I would be now if I just gave up. I probably wouldn't be around to see how much  great things I would have missed out on. So Thank you for supporting me everyone, you make pictures like this one happen, and you make me continue to fight.  

Thank you for reading, 

Derrick Rathgeber 

This image is now available for a live viewing at the Artscape exhibit in Riverside, CA. 
Spring - Summer exhibit from March 2013 - September 2013. 

To view my work visit the Artscape exhibit located at:
The Riverside County Administration Center
4080 Lemon St.,
Riverside, CA 92501
For more information contact  Rachael Dzikonski via email at rachael@riversideartscouncil.com.

Thursday, June 13, 2013

I am Ready to Get Started….In Just a Bit.

One of the most difficult things I have trouble with as an artist is just getting started. To me it’s something that drags me down like quicksand. The struggle of pulling myself together is a fight I deal with daily, and the more I fight to get started I find myself procrastinating more. In my case I feel as if I start one project I am neglecting myself of another. As of now I have split my talents into several different locations, that I am completely scatterbrained at times. It’s as if I am stuck in a dark tunnel with ten paths to choose, and rather than take the chance of taking the wrong path I stay in the same spot. Unfortunately choosing the safe spot moves me nowhere and nothing gets done, and every project suffers.

If you are new to my blog, or website my name is Derrick Rathgeber, and I am a husband, father of four great kids, a colored pencil artist, comic strip writer/artist, blog writer, free online art teacher, web designer, graphic designer, and soon I will try my hand at writing a book. All that is true I have done all those things, and you can find them on my website and right here on this very blog page. What the funny part is that I have put my hat in so many pots that I have overwhelmed myself to the point where I don’t know what I want to do. Each of these things are my hobbies, and I really do enjoy them all equally. I love making people laugh with my comic strips, I love designing characters for my story, and I love drawing detailed pictures with my colored pencils. So how do I choose? When I finish one project, how do I choose what to do next? When I start one I put all my energy into it, energy that I could have put into another one.

This was a problem for me for a very long time. I tried different things, and ultimately what worked best was just being down right organized. First of all my greatest enemy is procrastination. That to this day is the hardest enemy to kick in the rear, but you know what I am learning. I’ll start tomorrow, I never do anything for myself, I am tired, I don’t have what I need and so on. Some great tips to help with this little demon are as follows.
  1.  Ask yourself: Is what I am doing now beneficial? What would be more rewarding? How will I feel if I continue to put this off?
  2. Put off Procrastination: It may sound funny but think about it. Turn off any devices that may lure you away from your projects ie. Tv, internet, PHONE! All these things will be there later.
  3. Reward yourself: I always tell myself if I draw today for x amount of time then I get to have x amount of time to do something I like GUILT FREE.
  4.  Break it down: Sometimes we are overwhelmed by a large project. So overwhelmed that we don’t start it. So break it down. Say I am going to sketch it today, color this section tomorrow ect. This also helps you take your time and enjoy your new project.
  5. Share your Success: Let people know how important it is to you. Sometimes we feel guilty for taking time from our friends and family. Sometimes they don’t understand what it means for you to be productive. Let them know, and ask for support. Say don’t call around 2-4pm I will be working, or can you watch the kids for a bit. And once you are finished working thank them by giving them your full attention. 

When it comes to deciding on what to work on next that is another hang up us artists deal with. Do we start on that commission piece? Do we draw that picture your mom has been asking for? Do I dare ignore everyone and draw that image bouncing around in my head? Again it answers the question how do I spend my time and energy? In my case I pulled myself so thin at one point that I just fell apart and did nothing. I had to get focused, and combat this problem because I wasn’t getting anything done. So what I did was I got organized. This was very important for me because I was all over the place. I didn’t even know what projects I had half of the time, or what I finished. So these are some of the things I did, that you can do yourself, to get organized.
  1. Make a list: Write down a list of projects you have. This can be commissions, drawings you would like to do, blogs, website, ect.
  2. Prioritize them: Number these projects from 1-10+ based on which projects you would like to get done, or maybe ones you were putting off that you would like to finish.
  3. Make a Time Table: Next to each item write down how much time you need for each project. If it’s unknown it’s not a big problem. Ones that you can finish fast are good ones to knock off in-between larger projects.
  4. Make a calendar: This is actually fun. Make yourself a weekly calendar giving yourself that day to work on a specific project, and be sure to add a FREE DAY on this calendar to give you the opportunity to work on projects that are behind, to work on whatever you want,  or just take a day off to rest.
  5. Don’t make it Law: If you have to make adjustments it’s okay. Life changes and so can your schedule. So don’t feel guilt about changing the calendar, or missing a day or two. It’s mainly a tool to help you decide on what to work on that day. If your heart is in another project follow it and finish that project, you should never force it.


Once you have everything in perspective you will find your days going much smoother and a lot of guilt that goes along with starting something new will start to pass. You want to get into a good routine of developing yourself as an artist, but also find yourself being productive. Above all try not to make it work. A reason some of us find it hard to start up something new is fear, and worry. We worry that it won’t come out right, or fear that it has become work instead of enjoying it. When you feel that pressure, and fear building up just sketch. Don’t feel obligated to share it, just grab your sketchbook and just draw. This helps relieve that pressure we all feel to be at our very best all of the time. As artists we are our worst judges, and that can do nothing but hold us back.

So today if you are holding back a great new design that can wait, push through the muddiness and get through. Today it’s harder than ever with the many distractions that we face, but we have to close that world off and dive into our imaginations and pull it out. It’s not an easy fight sometimes, but this world of technology needs more creativity. Just remember every time you start a new project you are making the world that much better and more imaginative. That itself is a great reward, and incentive to start today.

Thank you for reading,
Derrick Rathgeber

Feel Free to find me on my website at http://DerricktheArtist.com


Wednesday, June 5, 2013

How to Draw Glass with Colored Pencils: Erasing to Add Detail

How to Draw Glass with Colored Pencils: Erasing to Add Detail  
by Derrick Rathgeber

Thank you for visiting. In this lesson I will teach you how to draw a believable glass texture. Our subject will be a light bulb so we will be using grey colors for this lesson. You’ll even have a small bonus lesson for the metal texture at the base of the bulb. What you will be learning today is how to use your pencils to color smoothly, and how to take away from your drawing to add more depth and detail. Are you ready to get started?

First off the colors I chose for this lesson are as follows: Grey, Cool Grey, Dark Grey, Black and White.  Also we will be using an eraser. Preferable a white one, or gum eraser.


 Step 1: Using the Dark Grey draw out your light bulb. You can opt out the details in the middle if you like they are not necessary for this lesson. You do however want to get the bulb shape, and screw at the base. This lesson is more about coloring and texture than copying the image.

Hint: Any time you are drawing from a reference a good fun trick to do is draw the image upside down. It sounds funny but it tricks your brain into drawing what you see, and not what your brain knows.


Step 2: Using the Grey colored pencil you will fill in the lower area of the bulb using medium pressure. Once completed take your pencil and hold it at a slant so the point is flat against the paper. Lightly begin to shade in the rounded bulb area using rounded strokes back and forth. This will give you a smoother fill. Continue to crosshatch and fill in the top of the bulb, and the base of the bulb until you get a good smooth cover.

Hint: Practice, and do not rush. Remember you’re not in a race, and you won’t get a prize for finishing first. This is a technique that you are trying to learn. Take scratch paper and use the side of your pencil lead to make strokes of different lengths, and pressures.


Step 3: Here is where it gets fun. Find a good size eraser, preferably a gum eraser, or white art eraser. Now you can look at a light bulb for reference or visualize where you will see the shines. You can also use mine for reference. Start erasing away where you want to have the shines. Be sure to follow the shape of the bulb, and do not be afraid to erase the details of the center, that just gives it more character. This gives the illusion of a rounded shape that you can now view start viewing as glass.

Hint: We used grey in this lesson because our background is white. This is only to make the 2D object appear three dimensional. Now if you have the bulb in front of an object or let’s say a yellow wall, you would color the bulb the same color as the background, or slightly lighter color of the background depending on how thick you want the glass to appear.


Step 4: Now we have to make the glass shine more prominent. You can now use the Dark Grey color and start shading around the shines. We are going to add more pressure at the top of the bulb, the base of the glass, and around the erased shines. Be sure to blend the Dark Grey and Grey together by adding layers of color from dark to light. Also if you added the middle detail you will use the Dark Grey to define the glass on the inside as shown.


Step 5: In this step we are starting on the metal base. Simply use the Dark Grey again and fill in the areas as shown. It’s okay to make these areas dark as we are going to add black to it later. You want to show the light bending around the metal object. And this object is smooth.

Hint: When you draw metal objects be sure to pay attention to your light sources, and remember that light comes from behind too, as seen here.


Step 6: Using the Cool Grey color begin shading the base filling in the left side darker, and leaving the right side lighter. This shows where your light source is and keeps the color flowing across the object. You can even color up and down the screw base to ensure you get the same dark to light scale going from left to right. And remember this metal is also smooth so it’s a great way to practice your small smooth strokes.

Hint:  A good tool to help you blend your pencil drawing is a “Blinding stump.” They are highly affordable, and easy to use. If not you can always use your fingers to smudge the colors together. I did before I know they existed.


Part 7: To add our finishing touches on this piece we are going to just define the light bulb, and highlight the shines. So let’s start off by grabbing the Black pencil. Start by outlining the bulb, and shading in areas of the bulb close to the base and around the top. Take a step back and look at your image and you can see where the shadows are coming from. Those are the areas you want to darken.  Next you will use the Black to also darken the shadows on the metal base to really make the metal shine, and stand out from the glass. You can also add a layer of shading to make it darker from the glass bulb.

Finally we are going to use the White pencil to color over the middle of the glass and shines to really make the center pop. Almost like the light is starting to light up. And to finish the drawing off add white to the right side of the metal base, and around the sides to show where the light is coming from.

I hope you enjoyed this lesson. Please email any comments or suggestions to DerricktheArtist@Live.com. Find my new portfolio page at http://Derricktheartist.com. 

I would like to see your work. In fact if you share your results here on my Art Facebook page - HERE -, I will randomly select someone to give the original signed copy to. FREE of charge. I hope to see some of your work. (Feel free to add to it if you have any "bright ideas." 

Again thank you for allowing me to share these tips and tricks with you, and if you have something you would like to learn feel free to suggest it to me anytime. Have a great day!


Friday, May 31, 2013

The Angel of Death - by Derrick Rathgeber


The Angel of Death - by Derrick Rathgeber

The colored pencil illustration of my wife's beautiful poem. She really does bring out the best in me, and inspires my best work. Enjoy her poetry below.

Angel of Death
By Patricia Fernandez-Rathgeber

“Come dance in the moonlight, little sister.” He calls
The blades sheen reflects off my pale skin
His shadow grows up against the dark walls
As we dance, the darkness blends and I don’t know where he ends and I begin
A tear against the flesh gives way to liquid crimson
The blood, it streams down to the ground
I watch my life melt away, a stream that glistens
The silence is so loud even though there is no sound
He turns me, dips me and I feel faint
I float like a feather, so light weight
He kisses me, my metallic Saint
The taste of his victory over me, I’ve met my fate
The nirvana of the spins makes me drunk as I slowly lose life
His wings spread wide like a bird of prey with meat in his sight
I can’t refuse his kiss, no strife
Growing weak, I no longer put up a fight
I allow myself to fade in his arms
Taking it all in, my memories flash by so fast
Soaking up all his whispery charms
His kiss, the sin, is my very last.

Visit me on Facebook at http://Facebook.com/DerrickRathgeber

Thursday, May 9, 2013

How to Color a Delicious Pink Lady Apple With Colored Pencils


How to Color a Delicious Pink Lady Apple With Colored Pencils
by Derrick Rathgeber


RoseArt Colored Pencils we will be using.
• White
• Golden Yellow
• True Orange
• Bronze Yellow
• Celery
• Cardinal Red
• Cherry Red
• Raspberry
• Brown
• Black

Welcome to the great drawing lessons here on my webpage. Today I will be teaching you how to color your very own delicious pink lady apple. In this exercise I will give you tips on how to over lay colors, blend them to create lights and shadows, as well as textures. So let’s get started shall we.

Step 1: If you are comfortable with your drawing skills start off your picture by drawing the apple shape below with the brown colored pencil. Remember your apple does not have to be a perfect shape because no apple is a perfect sphere.


Tips: A PDF version is available if you would like to skip this step and go right into the coloring.Follow this link to download the image  here:
http://www.4shared.com/office/H4G4z-BY/How_to_Draw_an_Apple_001.html

Step 2: Using the Golden Yellow make dark to light strokes outlining the shine. Start at the base of the stem and define the shape of the apple. This color will act as the base and guide for the rest of the colors to come. Next use the Bronze Yellow and darken the yellow areas on the stem and the area around the stem. This will help blend into the green Celery color in the next step.


Tips: Use more pressure on the pencil at the edges and around the shine areas, then slowly raise the pencil up decreasing the pressure of the pencil.

Step 3: Using the Celery color you will go over the Golden Yellow color on the top of the apple. Start from the base of the stem and create lines in arc shapes to the rim of the apple, then fill them in with the Celery green covering a good area of the top of the apple, but leave some areas not covered with the green for the red to show through. Also add some Celery color to the stem as well.


Step 4: Now it’s time to set the base for rest of the apple. Using the True Orange color we will start from the stem base and color the apple almost like a pumpkin. Fill in the top half of the apple leaving small empty spaces along the edge, and along the base of the bottom. Keep a white strip-like area empty along the right side of the apple, as this will act as a reflective shine making the apple look more realistic.


Tips: References are great. If you have an apple at home shine a light on it to see how light shines and reflects on it so you can replicate this effect in your drawing.

Step 5: It’s time to watch your apple come to life. Use the Cardinal Red and cover the apple in nice even strokes with the apple from top to bottom and at a curve. Remember to leave the large shine in the center, and on the right of the apple clear. I like to rotate the paper so I can keep my hand still and move only the pencil across the paper. Once the apple is covered evenly, begin adding pressure (making darker pencil strokes), and coloring in areas darker near the edges and the top of the apple. Leave the area near the large shine spot lightened as shown in the picture.


Tips: Try to keep your pencil stokes in one direction. In this case arc them downward creating the illusion of a round object. After you have covered the area you can crosshatch to darken areas of the drawing.

Step 6: The candy apple red that makes you drool, that’s what we are going for. So let’s add the next layer of red. This time we are using Cherry Red to help fill in gaps, smoothen out our fruit, and generate a one of a kind look. Starting at the borders of the apple we are going to go over the Cardinal Red with Cherry Red and start coloring towards the shine, lightening our strokes as you reach the shine spot. Also get the top of the apple, and overlay using the Cherry Red partially over the yellows and greens to pull it all together. When you are satisfied with the look of your apple, move on to the next layer of red in the next step. Yep that’s right Three layers of red.


Step 7: This is the last layer of red I promise. Grab the Raspberry Red colored pencil and use heavy pressure along the areas you want to add shadows to. You can use the image as reference or use your gut. Get the areas close to the edges, and highlight the shine on the top near the stem. At this point your apple will have a realistic shine and reflect the paper it is drawn on. As an option also use this color to create a shadow underneath the apple. Remember where your light is coming from and color your shadow based on that. In this case I have light coming from the rear and the front so the shadow is outlined as shown.


Tips: If your drawing doesn’t look like the image shown do not worry. If I were to draw this again mine would look different too. Remember to enjoy yourself and take your time.

Step 8: Time to give your apple an earthy look, and finally give that stem some color. Reach for the Brown and fill in the stem from base to top leaving some green color. Remember to color with the stem shape, and for an extra measure of realism sketch some harder lines. Next add a layer of Brown across the entire apple, and the shadow. Remember to leave the shines white. Adjust your pressure of your coloring pencil to the light or hard coloring pressure that you want. This gives the apple some more texture, and colors to capture the eye.


Tip: If you would like to color the apple with other colors you can use these techniques with most fruit and objects. Simple adjust your color palette, and have fun.

Step 9: We are now heading to the final touch ups. Get a hold of the Black pencil and we will finalize the shadows. Start off by coloring over the shadow on the floor underneath the apple. Once you are finished start darkening the left side using the shines as a guide to where to stop. On the right side of the apple you will start from the white strip and go from heavy pressure to light pressure as you meet in the middle. Then add some dark areas in the stem to show that the apple dips in. Once you are satisfied with your look we will move on to the final step.


Tips: Black is your friend. With colored pencils you can cover other colors without making over shadowing them completely. If you need to go darker simply add another layer.

Step 10: And we are at the finish line! This step is probably one that most people don’t see coming. Go ahead and take the white pencil, and start coloring over the entire apple. You will notice that as you color, the colors will not only lighten up but they will blend together and smoothen out. This is probably one of the greatest kept secrets, and now you know. The white colored pencil is probably the most important pencil in your collection.


Check back here on Http://derrickr.artist.cm for more drawing tips and lessons by Derrick Rathgeber. These lessons are also available on Http://RoseArt.com/Blog. 

If you have any questions or comments I would love to answer them for you. Contact me at derrickr333@gmail.com. 

Thank you for visiting. 
DerrickRathgeber 

In Feed AD